Buying Guides
How to Install a Spare Tire Cover: The Ultimate Easy Guide (2026)
May
Installing a spare tire cover correctly takes under 5 minutes and requires zero tools. But doing it wrong — wrong size, loose drawcord, misaligned camera hole — means your cover flaps at highway speeds, wears out early, or blocks your backup camera.
This guide walks you through exactly how to install a spare tire cover step by step, how to remove it quickly roadside, how to clean it properly, and how to maintain it so it lasts for years.
Jump to what you need:
- Before You Install: Quick Checklist
- How to Install (5 Steps)
- How Long Does It Take?
- How to Remove a Spare Tire Cover
- How to Clean a Spare Tire Cover
- Maintenance Tips for Long Life
- How Long Do Spare Tire Covers Last?
- Signs It’s Time to Replace
- Common Installation Mistakes
- FAQ
Before You Install a Spare Tire Cover: Quick Checklist
Before learning how to install a spare tire cover, confirm these 3 things — they determine whether your installation will succeed or fail:
| # | Check | Why It Matters | How to Verify |
|---|---|---|---|
| 1 | Correct size | Wrong size = won’t fit or looks sloppy | Read sidewall code + match to size chart |
| 2 | Camera hole option | Wrong option = blocked camera or unnecessary hole | Check if backup camera is on spare tire |
| 3 | Tire is inflated | Flat tire = cover fits incorrectly, may be too large | Check tire pressure before installing |
If you haven’t ordered yet and aren’t sure about sizing, see: How to Choose Spare Tire Cover Size
Once you confirm size and camera hole option, installing a spare tire cover takes under 5 minutes with zero tools.
How to Install a Spare Tire Cover: 5 Steps

No tools required. The entire process takes 3–5 minutes for first-time installation and under 2 minutes once you’ve done it before.
Step 1 — Clean the Spare Tire First
Wipe the tire with a damp cloth to remove dust, mud, and moisture. A clean surface helps the cover sit evenly and prevents trapped grit from abrading the inside of the cover over time.
This step is optional but recommended — especially if the tire has been sitting outdoors for a while.
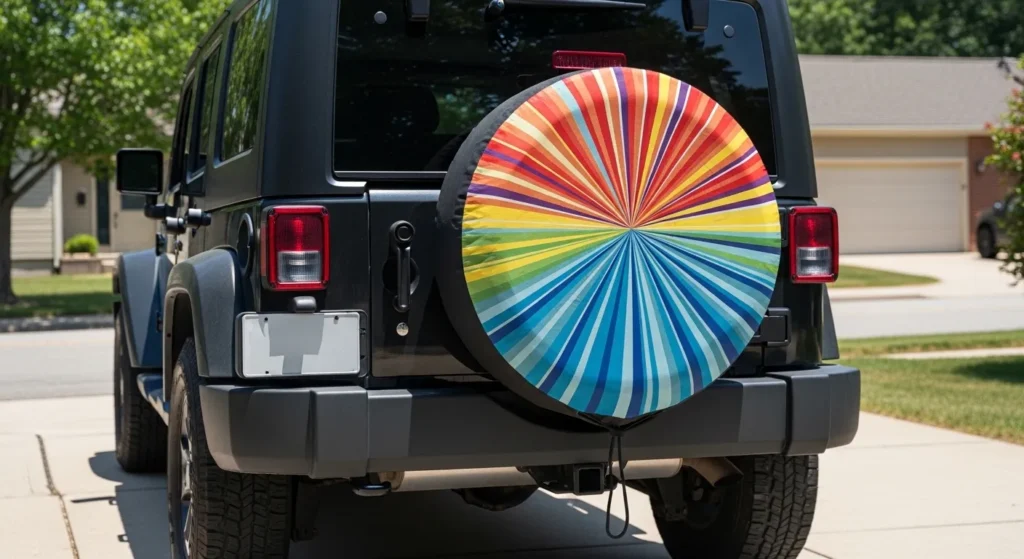
Step 2 — Orient the Cover Correctly
Hold the cover face-out (design facing away from the vehicle) and locate the drawcord opening at the back.
If your cover has a camera hole: Before placing the cover, identify where your backup camera lens is positioned on the tire. You’ll need to align the hole with the lens in the next step.
Step 3 — Place the Cover Over the Tire
Starting from the top of the tire, pull the cover down and over the tire in one smooth motion — like pulling a hat onto a head. Work around the edges to ensure the cover wraps evenly all the way around.
If you have a camera hole cover: As you pull the cover down, guide the camera hole to align with the lens position. Check alignment before tightening.
Step 4 — Tighten the Drawcord
Pull the drawcord firmly until the cover fits snugly against the back of the tire. The cover should feel taut — no loose or floppy sections. Tie or secure the drawcord ends so they don’t dangle.
This is the most important step. A loose drawcord is the #1 reason covers flap at highway speeds or slide off over time.
Step 5 — Final Check
Step back and inspect the cover:
- Design is centered and facing the correct direction ✅
- No wrinkles, bunching, or loose sections ✅
- Camera hole (if applicable) aligns with the lens ✅
- Drawcord is tight and secured ✅
Installation complete.
How Long Does Installation Take?
| Situation | Time |
|---|---|
| First time (including tire cleaning) | 5–7 minutes |
| First time (no cleaning) | 3–5 minutes |
| Once you’ve done it before | Under 2 minutes |
| Emergency roadside removal | Under 1 minute (loosen drawcord + pull off) |
How to Remove a Spare Tire Cover Quickly
Removing the cover is even faster than installing it:
- Loosen the drawcord completely
- Pull the cover off evenly from the bottom up
- If storing: shake off any debris and let it air dry before folding
- Store flat or loosely rolled — avoid sharp folds over the printed area
Roadside tip: If you need to access the spare tire in an emergency, the cover comes off in under 60 seconds. Loosen the drawcord and pull — no tools needed.
How to Clean a Spare Tire Cover
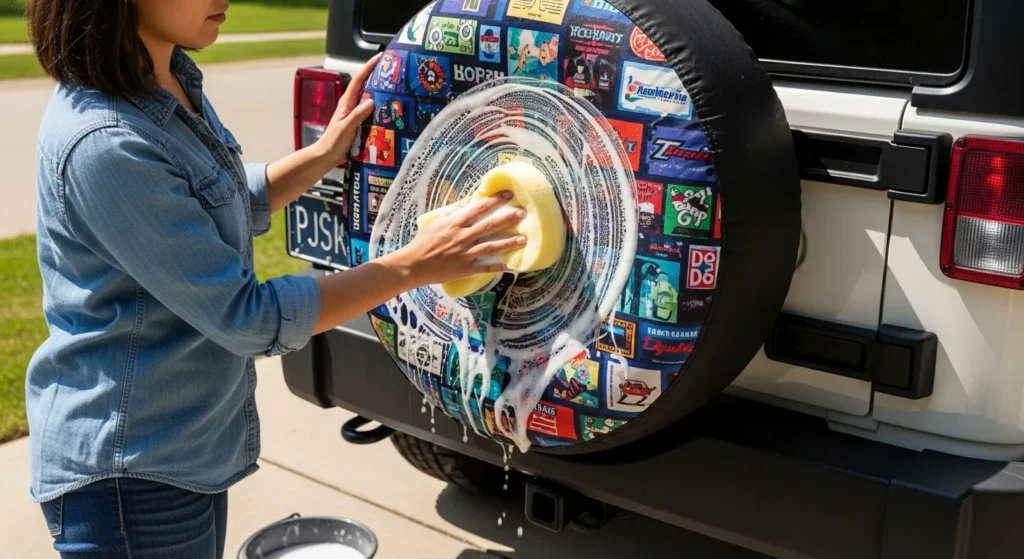
Regular cleaning keeps your cover looking sharp and extends its lifespan significantly. Road grime, bird droppings, and UV exposure accelerate fabric degradation — a clean cover lasts noticeably longer than a neglected one.
Recommended Cleaning Method
- Mix mild dish soap or car wash soap with lukewarm water
- Dip a soft cloth or sponge into the solution
- Gently wipe the cover face in circular motions
- Pay extra attention to edge stitching where dirt accumulates
- Rinse thoroughly with clean water — remove all soap residue
- Air dry completely before reinstalling or storing
| ✅ Safe to Use | ❌ Never Use |
|---|---|
| Mild dish soap | Bleach or chlorine-based cleaners |
| Car wash soap | Harsh degreasers or solvents |
| Soft cloth or sponge | Abrasive brushes or steel wool |
| Lukewarm water | High-pressure power washers |
| Air drying | Tumble dryer or direct heat |
Why avoid harsh chemicals? Bleach and strong solvents break down the polyester fibers and damage dye-sublimation prints from the inside out — the fabric weakens and colors fade years earlier than normal. Mild soap and water is all you ever need.
How Often Should You Clean?
| Usage Type | Recommended Cleaning Frequency |
|---|---|
| Daily highway driving | Every 1–2 months |
| Off-road or muddy conditions | After every heavy use session |
| RV / long-term outdoor parking | Monthly — more UV and ozone exposure |
| Before long-term storage | Always clean before storing |
Maintenance Tips to Make Your Spare Tire Cover Last Longer
Beyond cleaning, these habits will significantly extend the life of your cover:
| Habit | Why It Helps | How Often |
|---|---|---|
| Check drawcord tightness | Loose covers vibrate against the tire, causing friction wear | Monthly |
| Inspect edge stitching | Early detection of fraying prevents larger tears | Every 3 months |
| Remove during extreme weather storage | Extended exposure to ice, hail, or extreme heat accelerates degradation | Before long storage |
| Store flat or loosely rolled | Sharp folds crack the print over time | When not in use |
| Apply UV fabric protector spray | Adds an extra barrier against UV fade (optional but effective) | Every 6 months |
How Long Do Spare Tire Covers Last?
Lifespan varies significantly depending on quality, usage, and care:
| Cover Type | Average Lifespan | With Regular Cleaning |
|---|---|---|
| Budget screen-printed cover | 6–18 months | Up to 2 years |
| Quality dye-sublimation cover | 3–5 years | 5–7+ years |
| Same cover in hot/sunny climate | Reduce by ~20% | UV spray helps offset this |
| Same cover in mild climate | Add 1–2 years | Can exceed 7 years with care |
According to Consumer Reports, regular exterior maintenance significantly extends the lifespan of vehicle accessories exposed to UV and weather — consistent with what we see from customers who clean their covers regularly.
Signs It’s Time to Replace Your Spare Tire Cover
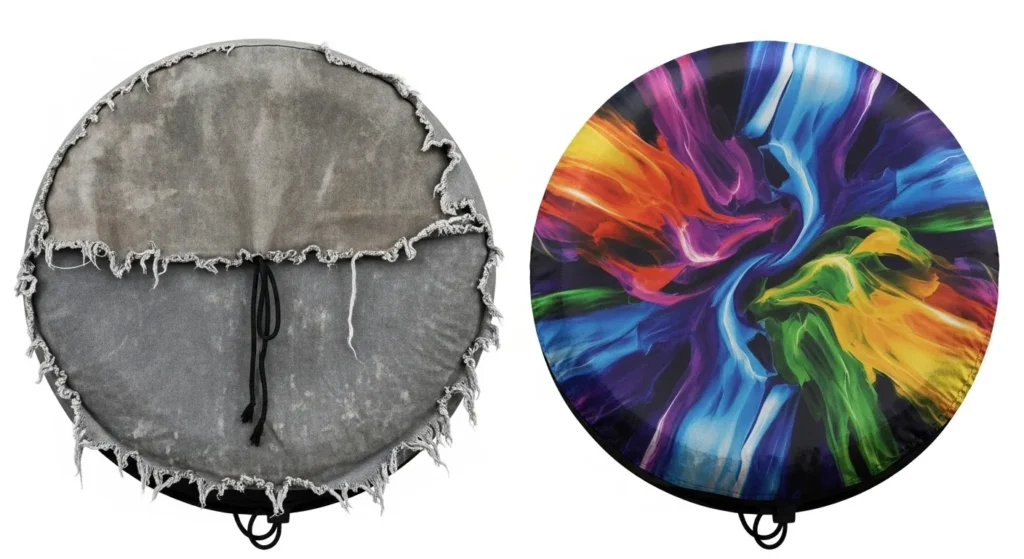
Even with good maintenance, covers eventually wear out. Watch for these signs:
- Fabric thinning or developing holes — UV degradation has broken down the fibers
- Drawcord channel fraying badly — the cover can no longer be secured properly
- Design severely faded — significant color loss means the UV protection layer is also compromised
- Cover no longer fits snugly — elastic or drawcord has lost tension permanently
- Visible cracking in the fabric — the material has begun to degrade structurally
When any of these appear, it’s time to replace. A worn cover provides less UV and weather protection — the primary reason you have it in the first place.
→ Browse replacement spare tire covers →
5 Common Installation Mistakes to Avoid
Mistake 1 — Wrong Size Cover
A cover that’s one inch too small will be extremely difficult to install and risks tearing. A cover one inch too large will never sit flush — it wrinkles and sags. Always measure your tire before ordering. → Size guide
Mistake 2 — Drawcord Not Tight Enough
This is the most common installation error. At highway speeds, even a slightly loose cover creates flapping that rapidly wears out the fabric and loosens the closure further. Pull the drawcord tight — tighter than feels necessary — then secure it.
Mistake 3 — Installing on a Flat Tire
A flat spare tire has a smaller diameter than an inflated one. A cover installed on a flat tire will appear to fit, but once the tire is inflated the cover will be stretched and possibly won’t close properly. Always ensure the spare is at correct pressure before installing.
Mistake 4 — Camera Hole Misaligned
If your cover has a camera hole, rushing the installation and not aligning the hole with the lens leaves the camera partially blocked. Take an extra 30 seconds to check alignment before tightening the drawcord. → Camera hole guide
Mistake 5 — Using Harsh Cleaners
Bleach, strong degreasers, and abrasive scrubbing are the fastest ways to destroy a custom print and weaken the fabric. Mild soap and a soft cloth is all that’s ever needed — it’s gentle enough to use weekly without any damage.
Frequently Asked Questions About Installing and Maintaining Spare Tire Covers
Can I install a spare tire cover by myself?
Yes — completely. Installation is designed for one person with no tools. The process takes 3–5 minutes the first time and under 2 minutes once you’re familiar with it.
Will the spare tire cover stay on at highway speeds?
Yes — when the correct size is ordered and the drawcord is fully tightened. The most common reason covers come loose at speed is an insufficiently tightened drawcord. Pull it as tight as it will go and secure the ends.
Can I leave the spare tire cover on year-round?
Yes. The cover is designed for continuous outdoor use. Regular cleaning and periodic drawcord checks are all that’s needed for year-round installation. In extremely harsh climates (prolonged sub-zero temperatures or desert heat), occasional removal during storage extends the cover’s life.
Can I machine wash a spare tire cover?
No — machine washing is not recommended. The agitation and heat of a machine wash can damage the dye-sublimation print and weaken the fabric structure. Hand wash with mild soap and cool water, then air dry.
How do I know if my spare tire cover is installed correctly?
A correctly installed cover sits flush against the tire with no visible wrinkles or loose sections, the design is centered and straight, the drawcord is tight with no slack, and (if applicable) the camera hole aligns with the lens. If any of these are off, loosen the drawcord and readjust before re-tightening.
What do I do if the cover is difficult to pull over the tire?
If the cover is genuinely hard to install, the most likely cause is incorrect size — the cover is one size too small. Do not force it — forcing an undersized cover risks tearing the fabric at the edges. If you ordered the correct size but it’s still stiff, try warming the cover slightly in sunlight before installation — the polyester becomes slightly more pliable when warm.
Can I install a spare tire cover on a tire that’s already mounted on the vehicle?
Yes — you don’t need to remove the tire from the vehicle to install the cover. Simply pull the cover over the tire while it’s mounted. This is the normal installation method for most vehicles.
Ready to Get the Right Cover for Your Spare Tire?
Now that you know exactly how to install a spare tire cover and keep it looking great for years, browse our full collection — available in sizes 27″ through 35″ with hundreds of designs for Jeep, SUV, RV, and trailer owners.